Traffic signs and road markings
From the Rules of the Road published by the Road Safety Authority (RSA). iTest.ie is not affiliated with the RSA — check rsa.ie for the latest edition. Read in the app (contents, picks up where you left off) →
In this section
- Regulatory signs
- Upright signs
- Stop and Yield signs
- Traffic lane control signs
- One-way streets
- Driving in a one-way street
- Streets for pedestrians
- Road markings
- Warning signs
- What they look like
- Roadwork signs
- Stop and Go traffic control at roadworks
- Variable Message Signs (VMS)
- Information signs
- What they look like
- Advanced direction signs
- Motorway information signs
- Markings for merging and diverging traffic (hatched markings)
- Markings for separating traffic (hatched markings)
- Traffic calming signs
- Urban slow zones (30Km/h) for housing estates
- Special signs and markings for buses, trams, rail and light rail
- Bus signs
- Bus lanes
- Contra-flow bus lane
- Bus-only streets
- Trams and light rail signs
- Regulatory signs for tram lanes
- Warning signs for tram lanes
- Railway level crossings
- Emergency actions at level crossings
- Unusual movements across level crossings
- Decision Support System (DSS)
- How to use different types of level crossings safely
- Pedestrians crossing the railway
- Emergency actions at level crossings
- Cyclists and horse riders crossing the railway
- Railway bridges and overhead structures
- Introduction
- Emergency actions – reporting bridge incidents
- Bridge under the railway with height restriction
- Bridge over the railway
- Road tunnel signs
You must know what traffic signs and road markings mean before you attempt to drive on a public road. This section focuses on the signs that you as a driver will come across most often. Sections 21 to 25 covers a range of the most important signs currently used on Irish roads.
You must know and understand these signs and respond correctly when you see them on the road.
Traffic signs and roadway markings are divided into three broad categories:
- Regulatory,
- Warning, and
- Information.
Sometimes signs from different categories are used together to improve road safety.
Different types of signs are used for bus and cycle lanes, motorways and railway crossings and bridges. There is also a special series of warning signs for roadworks. These are all outlined at the end of this section.
Regulatory signs
These indicate what you must do under road traffic law, so all road users must obey them. Regulatory signs are divided into a number of groups:
- Upright signs;
- Road markings; and
- Traffic lights.
This section concentrates on regulatory upright signs and road markings. Section 7 covers traffic lights in detail.
Upright signs
What they look like:
These generally come in two formats. Their shape can be circular, octagonal, triangular or rectangular, as shown in the examples below:
- a white background with a red border and black letters, symbols or numbers, and
- a blue background with white symbols or letters.
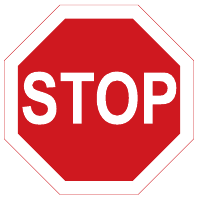
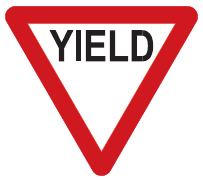
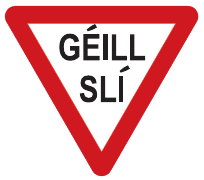
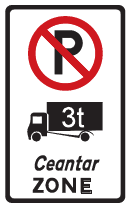
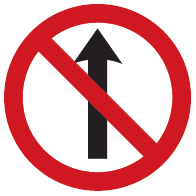
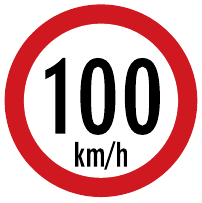
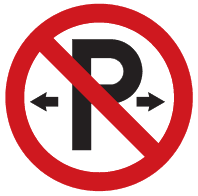
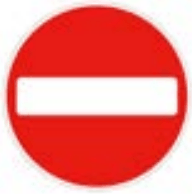
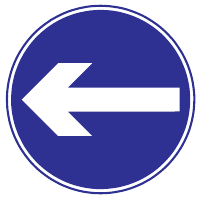
Please note that it is a fixed charge offence of €60 to ignore the ‘No entry to vehicles’ sign pictured above.
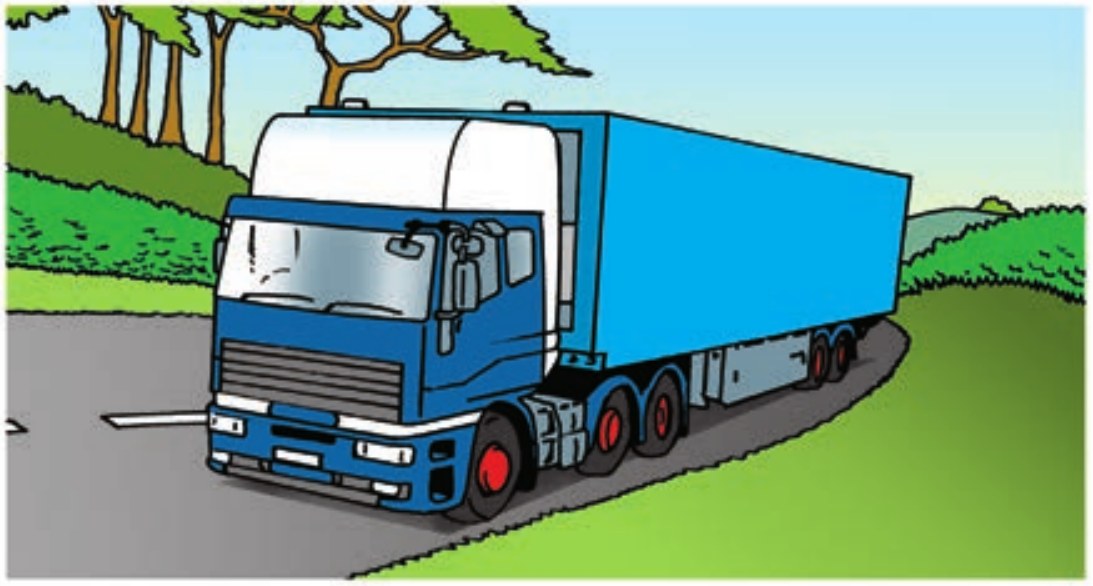
The sign below applies to drivers of HGVs and large non-passenger vehicles. It means that vehicles with the number of axles shown (or more) cannot use the road during the times shown without a permit. You should check the information plate or the permit to confirm the time limits and any restrictions that apply.
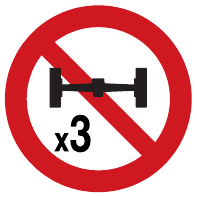
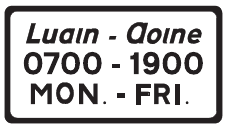
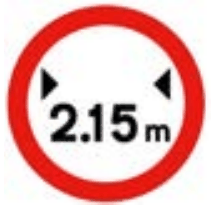
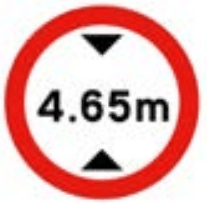
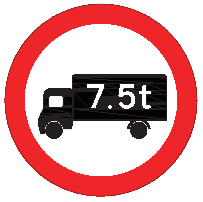
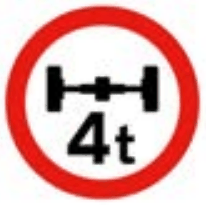
The signs below apply to all drivers of vehicles which may exceed the weight, width or length restrictions on certain roads. You must comply with such signs. It is an offence to proceed past such signs if your vehicle exceeds the maximum weight, width or length. This offence attracts a fixed charge of €60.
Stop and Yield signs
As you can see from the diagram, the upright Stop sign is a red octagon with a white border. It is the only regulatory sign of this shape. Stop signs appear at junctions with major roads. If you approach a Stop sign, you must stop completely before entering the major road, no matter how quiet it might appear.
The upright Yield sign shown is just one version of this sign. Other versions are the same shape and colour but might say ‘Yield Right of Way’, or ‘Géill Slí’. If you see a Yield sign on the road, usually near a junction or roundabout, you must give way to any traffic on a major road ahead and you must not proceed onto the main road until it is safe to do so. Make sure you allow enough time to complete your manoeuvre. It is better to be safe than sorry.
Traffic lane control signs
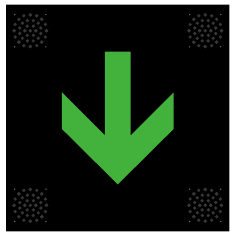
These traffic lane control signs will be found on national roads or motorways. When the signs are operational, the amber lights at the top and bottom will flash in turn.
A green arrow pointing down means the lane is open and you can proceed in that lane.
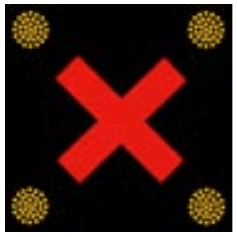
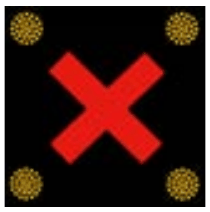
A red X means the lane is closed. You must stop. You must not pass this sign. It has the same effect as a stop sign.
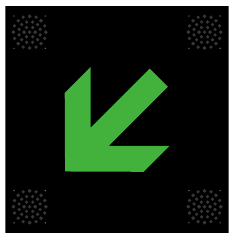
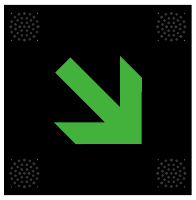
A green arrow pointing to the left means you must move into the left-hand lane. In doing so you must observe the general rules of the road about safely changing lanes.
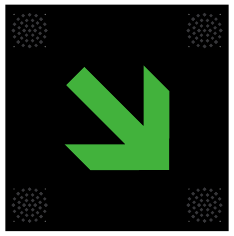
A green arrow pointing to the right means you must move into the right-hand lane. In doing so you must observe the general rules of the road relating to safely changing lanes.
Where a driver proceeds beyond one of the above traffic lane control signs other than in accordance with the sign or without yielding, they will be liable for a fixed charge of €60.
One-way streets
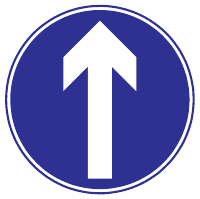
When you are approaching a one-way street, you may see one of two regulatory signs. If you are at the entrance to a one-way street, you will see the ‘Proceed Straight Ahead’ regulatory sign. If you are approaching the ‘wrong’ end of a one-way street, you will see the regulatory road markings shown below to indicate ‘No Entry’ and you must not enter past those markings.
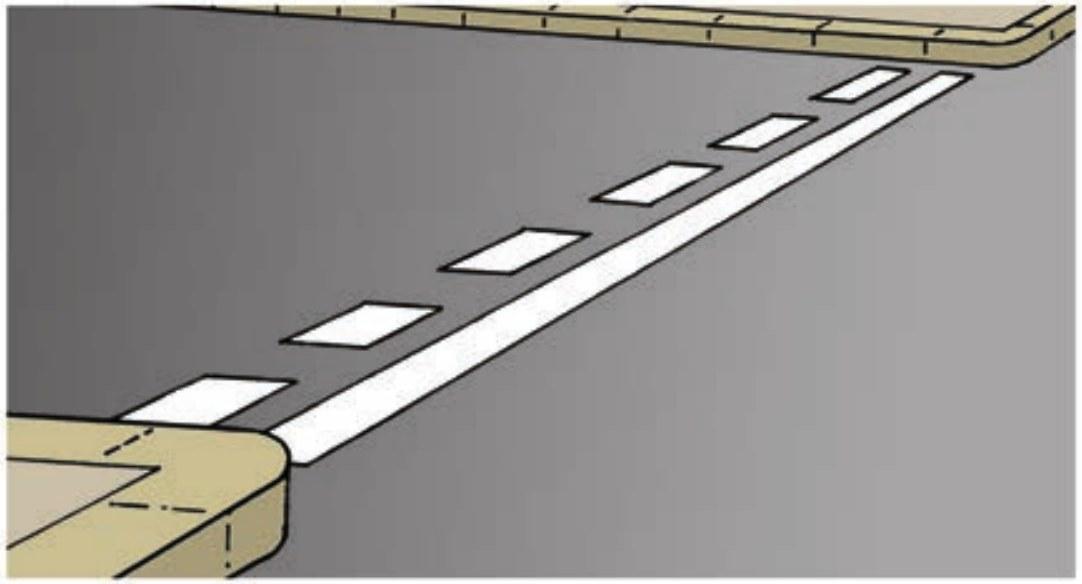
You may also see an upright ‘No Entry’ sign with the road markings.
Driving in a one-way street
Even though all traffic on a one-way street is travelling in the same direction, you should still drive on the left-hand side. You may leave the left-hand side only if you intend to overtake or turn right up ahead. You may drive on either side of a traffic island, but take note of arrow markings on the road.
Only change lanes if you have to. If you have to change lanes, check your mirrors and any blind spots for any traffic coming up behind you or overtaking you. When the way is clear, signal your intention and move, giving way to any traffic already in the lane.
When turning right from a one-way street, drive as close as you can to the right-hand side.
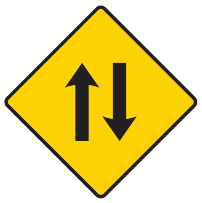
Remember that the road at the end of a one-way street may be two-way. You may see the warning sign below if it is.
Streets for pedestrians
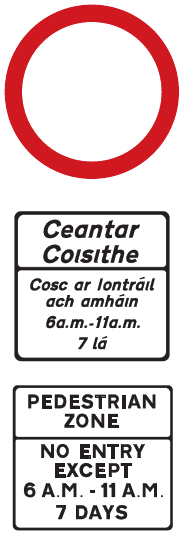
The regulatory sign below shows that the street is closed to all road users except pedestrians at the time shown on the information plate underneath.
Road markings
Road markings are a traffic sign in the form and design of a marking on the surface of the road. They have the same status as upright signs. Road users must obey these road markings.
The diagrams below show the most common types of road marking and what they mean.
| Road markings | What they mean | |
|---|---|---|
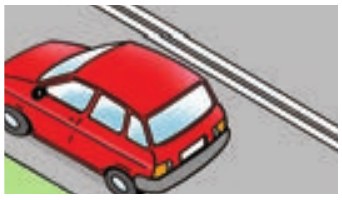
Single or double continuous white lines along the centre of the road |
These divide two lanes of traffic traveling in opposite directions. All traffic must keep to the left of the line (except in an emergency or for access). |
 |
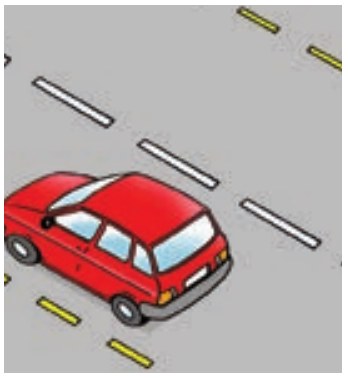
Longer white lines or shorter gaps between the lines along the centre of the road |
These divide two lanes of traffic traveling in opposite directions. These warning lines alert drivers to hazards such as restricted vision, approach to a junction, approach to a roundabout, a hill, crests, bends and continuous white line ahead. You must not cross them unless it is safe to do so. |
 |
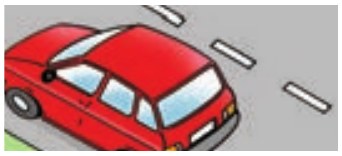
Short broken white lines along the centre of the road |
These divide two lanes of traffic travelling in opposite directions. You must not cross them unless it is safe to do so. |
 |
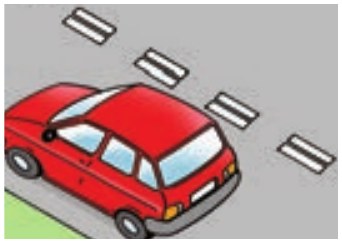
Double broken white lines along the centre of the road |
These divide two lanes of traffic traveling in opposite directions. These alert drivers to continuous white lines a short distance ahead. As a driver, you must not cross them unless it is safe to do so. |
 |
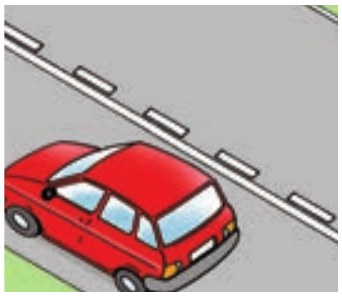
A broken white line with a single white line along the centre of the road |
These divide two lanes of traffic traveling in opposite directions. The driver must obey the line that is nearest to them. In this picture, the driver in the car must remain to the left of the continuous white line. |
 |
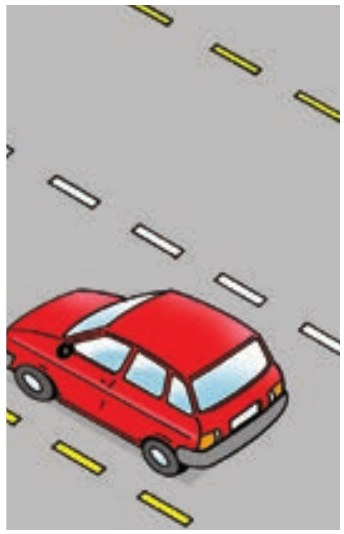
A single broken yellow line along the side of the road |
This road contains a hard shoulder, which is normally only for pedestrians and cyclists. If a driver wants to allow a vehicle behind them to overtake, they may pull in to the hard shoulder briefly (but do not continue driving in the hard shoulder) as long as no pedestrians or cyclists are already using it and no junctions or entrances are nearby. Different rules exist for hard shoulders on motorways. See Section 11 for details. |
 |
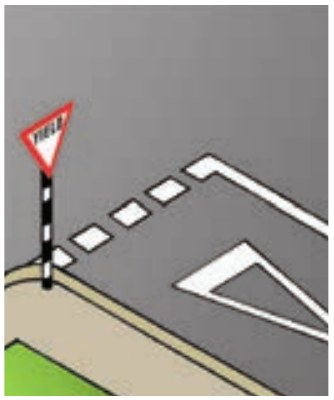
A broken white Yield line crossing the left-hand lane. A white triangular Yield symbol may also be provided with the Yield line. |
The driver must give right-of-way to any traffic on a major road ahead. The yield line usually appears with an upright Yield sign. |
 |
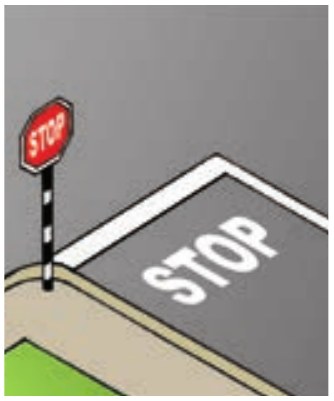
A continuous white Stop line crossing the left-hand lane. The word STOP may also be written near or at the Stop line. |
The driver must come to a complete stop before entering a major road. The stop line sometimes appears with an upright Stop sign. |
 |
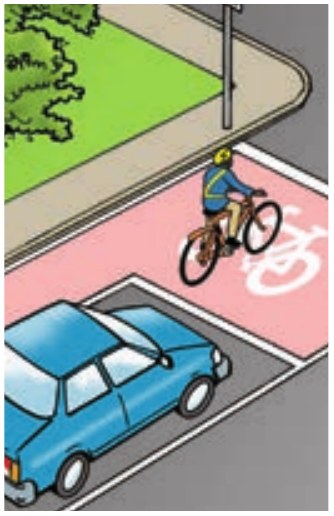
An advanced stop line for cyclists, which is in front of the stop line for other traffic |
Cyclists may position themselves in front of other traffic at a junction controlled by traffic lights. The motor vehicle driver must wait behind the first white line they reach and not cross into the shaded area. The driver must also give cyclists enough time and space to move off when the lights turn green. |
 |
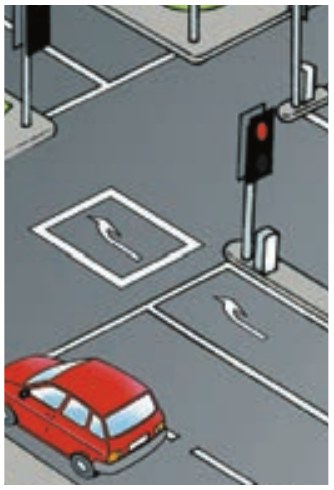
A turning box showing a white arrow in a white edged box, found at junctions controlled by traffic lights |
This shows where to position a vehicle if you want to take a right turn. Do not proceed into the box through a red light. If oncoming traffic means you cannot take a right turn immediately, you must wait in the box until you can safely take the turn. |
 |
Warning signs
These signs warn you of hazards ahead, such as roundabouts, crossroads, dangerous bends or anything else that would call on you to drive more carefully. You should always take special care when you see a warning sign. If you fail to observe these signs, you could create a hazard.
What they look like
All warning signs have the same format. They:
- are diamond or rectangular in shape;
- have a yellow background with a black border; and
- use a black symbol to show the hazard ahead.
They are also upright, meaning they are at the side of the road or mounted on a wall instead of painted onto the road surface.
This diagram shows some of the most common warning signs.
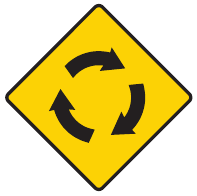
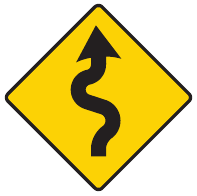
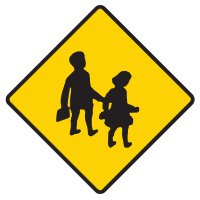
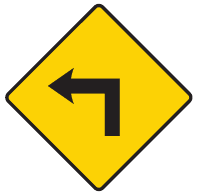
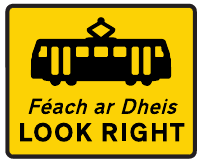
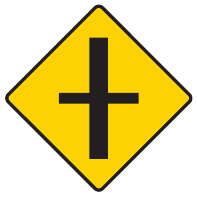
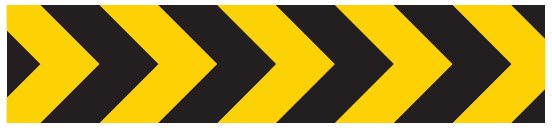
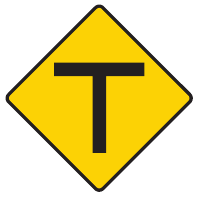
Section 22 has more examples of warning signs.
Roadwork signs
These signs differ from other warning signs. You should always take extra care and reduce your speed when you see these signs.
The signs are:
- rectangular or diamond in shape; and
- orange with a black border and black symbols or words.
The images below are examples of these signs.
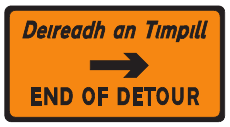
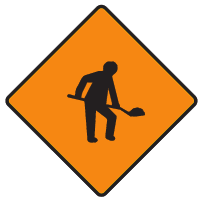
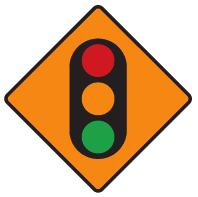
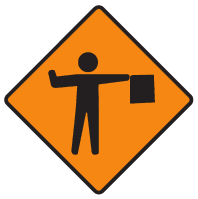
The movement of vehicles at or near roadworks is controlled by law.
Stop and Go traffic control at roadworks
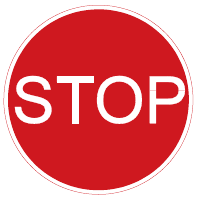
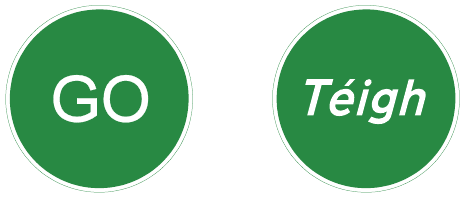
When roadworks are being carried out you must stop when you see the Stop sign (pictured below). You may only proceed through or past the roadworks when the Go sign (Téigh) is displayed. It is an offence not to obey these signs.
Where plant or machinery is crossing the roadway and no matter what direction you approach from, you must stop when you see the Stop sign (pictured below). You must obey these road signs. The signs can be operated by mechanical or manual means.
Manual traffic control sign at roadworks
There are more signs displayed in Section 23.
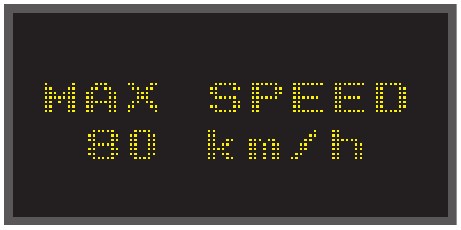
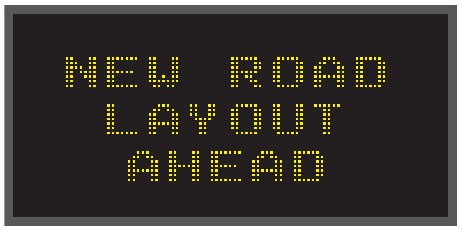
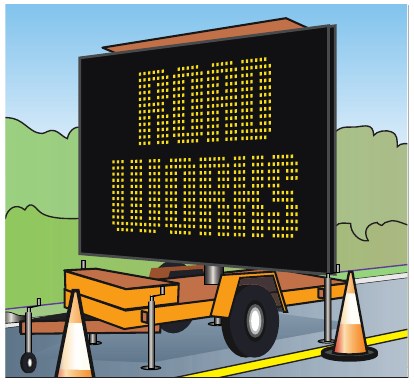
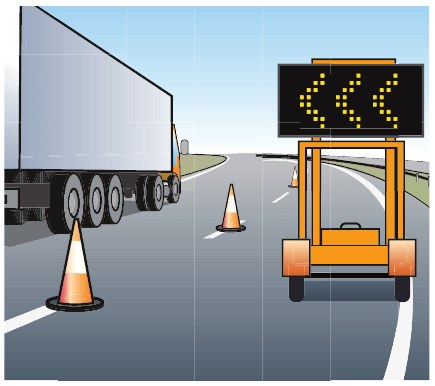
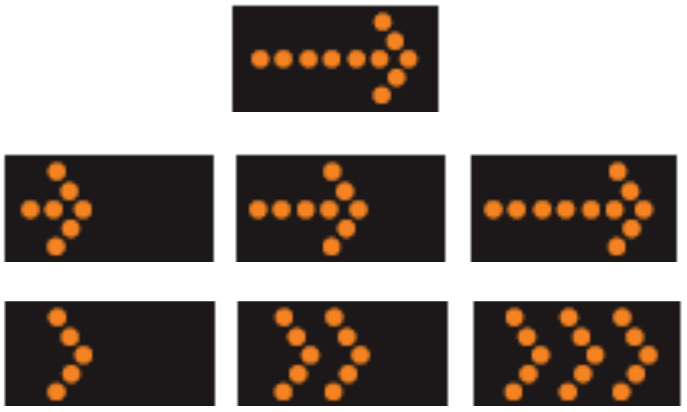
Variable Message Signs (VMS)
These signs provide information in an electronic format and are designed to inform you of a range of issues relating to roads, roadworks and road safety. The content of the sign will change, depending on the situation. You should pay particular attention to these signs and messages.
Information signs
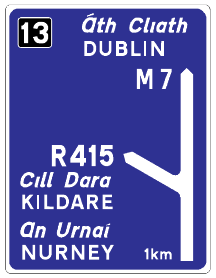
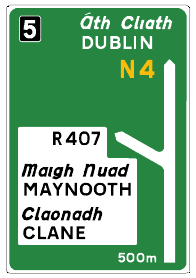
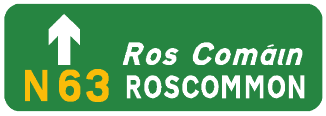
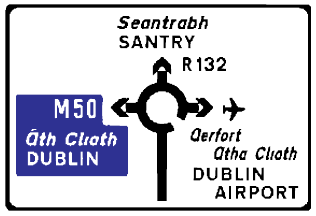
As their name suggests, these signs give information about directions and distances from your current location.
What they look like
There are three formats for information signs:
- blue signs with white letters on motorways,
- green signs with white letters, which are on national roads, and
- white signs with black letters, which are on local and regional roads.
Advanced direction signs
Motorway information signs
All motorway signs are blue. The following table identifies the most common signs and what they mean.
| Motorway signs | What they mean | |
|---|---|---|
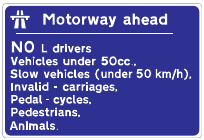 |
Motorway ahead | There is an entrance to a motorway ahead and the road users listed on the sign must not enter the motorway. |
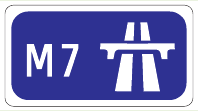 |
Entry to motorway | The road user is now entering a motorway and must obey motorway rules. This sign usually appears beside the ‘motorway ahead’ sign. |
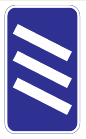 |
Countdown sign | The driver is 300 metres from the next exit off the motorway. |
 |
Countdown sign | The driver is 200 metres from the next exit. |
 |
Countdown sign | The driver is 100 metres from the next exit. |
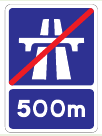 |
Motorway ends 500m ahead | There are 500 metres to the end of the motorway. |
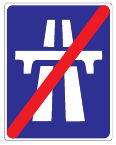 |
End of motorway | The driver has reached the end of the motorway. |
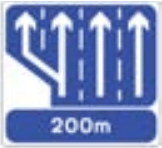 |
Lane gain sign | An additional lane is joining the motorway. |
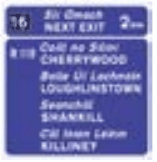 |
Next exit sign | Indicates distance to the next exit and supplementary routes. |
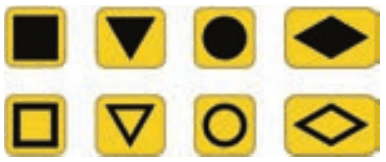 |
Emergency closure of sections on the motorway | Motorists must follow a particular symbol in order to re-join the motorway at the next junction. |
Section 11 covers the main rules on motorway driving. It is an offence to disobey these rules.
Markings for merging and diverging traffic (hatched markings)
The diagrams show how the markings can be used for:
- merging traffic – for example, where two lanes of traffic become one, and
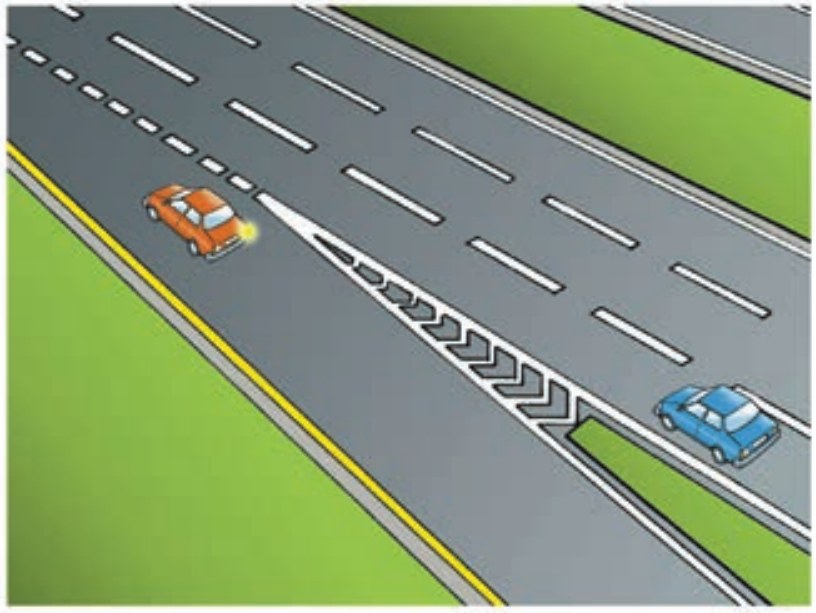
- diverging traffic – for example, where channelling traffic taking a left turn away from traffic going straight ahead.
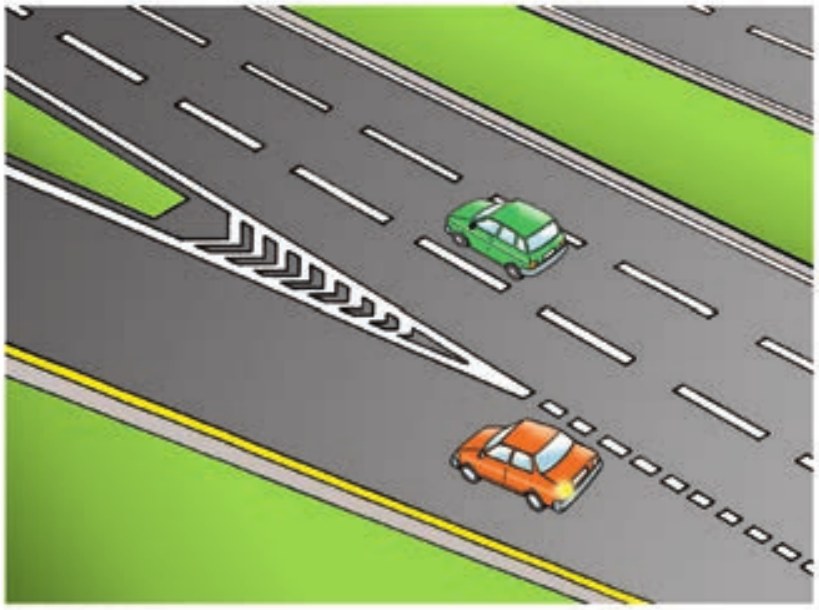
Markings for separating traffic (hatched markings)
Hatched markings can also be used for separating traffic travelling in opposite directions (in what are called central median islands).
If you see these markings on a road, you must not enter the area they cover.
A 2-plus-1 road consists of two lanes in one direction of travel and one lane in the other direction. The two-lane section allows for safe overtaking and alternates with a one-lane section roughly every 2 kilometres.
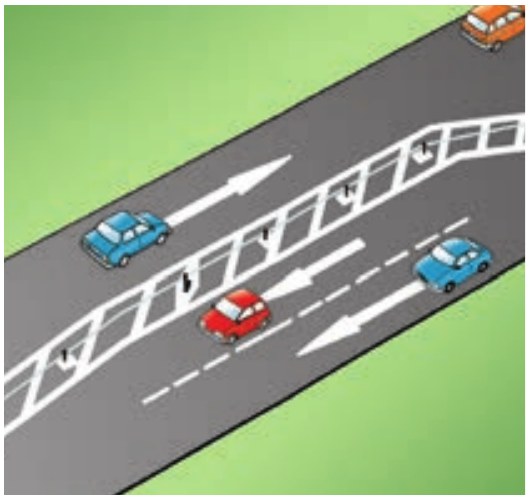
There may be a safety barrier in the centre of the road which separates the two directions of traffic and prevents drivers from overtaking in the one-lane section. If vehicles need to turn right, they can do so at junctions.
In other cases, drivers who need to turn right or turn around may first turn left onto a minor road and perform a U-turn in the area provided for that purpose. They can then resume their journey as originally intended.
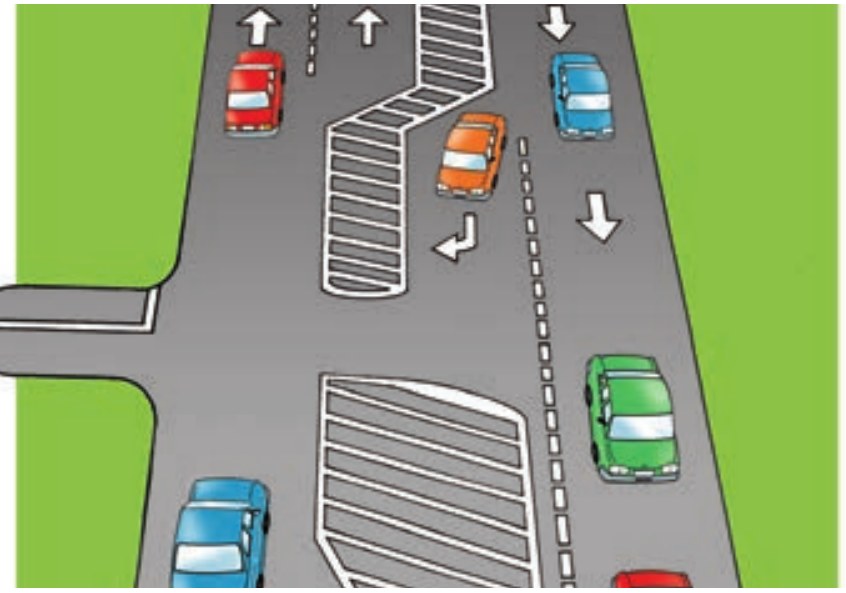
A form of 2-plus-1 road already exists on some climbing lanes on national primary roads – the uphill stretch is two lanes and the downhill stretch is just one.
Traffic calming signs
Some towns and villages use road features, signs and markings for traffic calming, which generally involves slowing the pace of traffic and managing its flow at junctions. The type of signs used for traffic calming are regulatory, warning and information. When you enter one of these towns or villages, you will see an information sign that may be combined with the town or village name and a speed limit sign.
In these towns, expect the following speed reducing measures:
- traffic islands,
- gateways,
- mini-roundabouts,
- build-outs,
- chicanes,
- pinch points, and
- ramps.
You may also come across the following signs on residential roads in built-up areas. These signs indicate that the road includes ramps, speed cushions or speed tables.
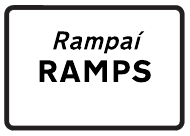
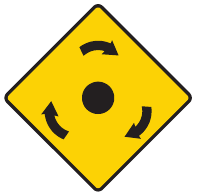
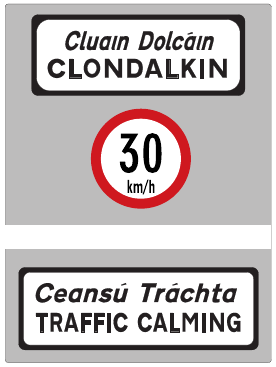
Please note that it is a fixed-charge offence of €60 plus one penalty point to violate the rules relating to mini-roundabouts, the information sign for which is shown above.
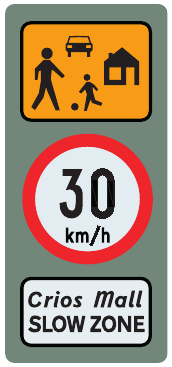
Urban slow zones (30Km/h) for housing estates
Slow zones are usually found in self-contained areas with local roads and low traffic volumes. Slow zones are usually accompanied by other traffic calming measures such as speed bumps. Road users should take extra care and expect the unexpected.
Special signs and markings for buses, trams, rail and light rail
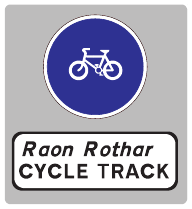
There are special regulatory signs and markings used to show the parts of a road that are reserved for particular vehicles – namely buses, bicycles, trams and light rail. The signs can be regulatory, warning or just for information. The design of these signs is consistent with the design of regulatory, warning and information signs.
This section deals with the more common signs that you will see as a road user. You should take care when you see any signs for buses, bicycles, trams, rail and light rail.
Bus signs
Bus lanes
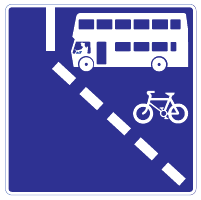
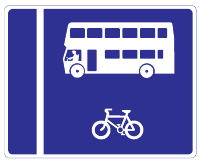
Bus lanes are sections of road reserved for buses, whether public or private. Taxis and bicycles may also use some bus lanes.
Where there is a bus lane, you will see an upright blue and white sign on the side of the road on a pole, and on the roadway there will be markings of a continuous white line and the words ‘Lána Bus’. You must obey the road marking and the sign. The white plate shows when the section of road is meant only for the buses shown. Normally, bus lanes operate from 7am to 7pm or during peak hours. Outside these times, all traffic may use them. You should check the information plate to confirm the time limits that apply.
There are two types of bus lane:
- with-flow, and
- contra-flow.
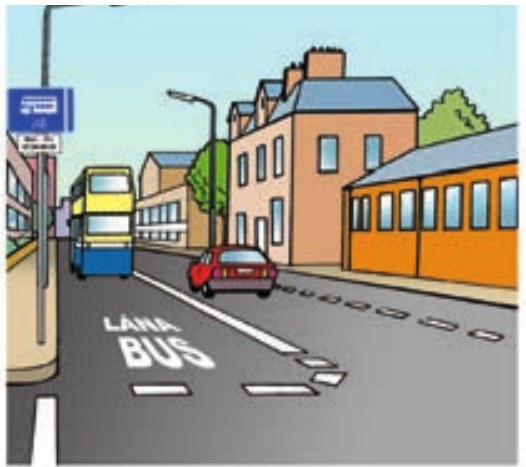
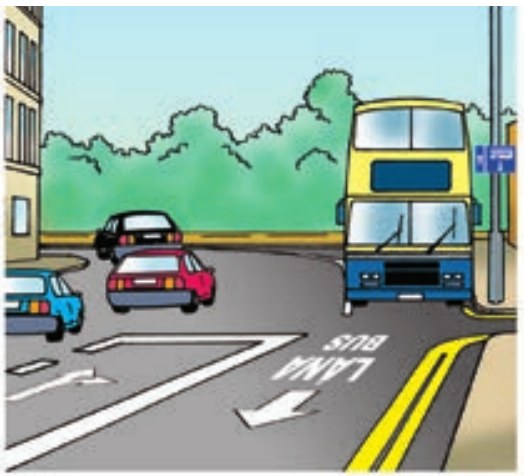
A with-flow near-side bus lane, shown below, runs in the same direction as the traffic beside it. It can be used by bicycles and taxis as well as buses, and is normally reserved during the periods shown on information signs at the start of the lane.
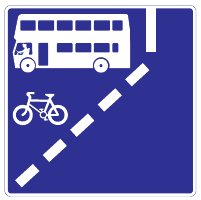
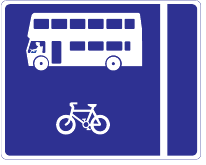
Contra-flow bus lane
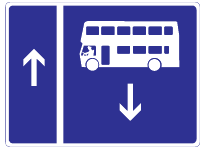
A contra-flow bus lane runs in the opposite direction to the traffic beside it. It is reserved only for buses, which generally means that no other traffic may use it, day or night, unless signs authorise its use by cyclists.
If a ‘Yield’ sign appears at the end of the bus lane, the bus must give way to other vehicles as it merges back into normal traffic.
Bus-only streets
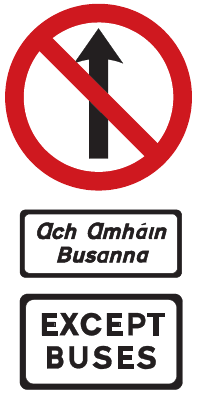
As their name suggests, these streets are intended only for buses. Other traffic may use them only to get access to a building or side road.
Section 10 covers the rules on parking in bus lanes.
Trams and light rail signs
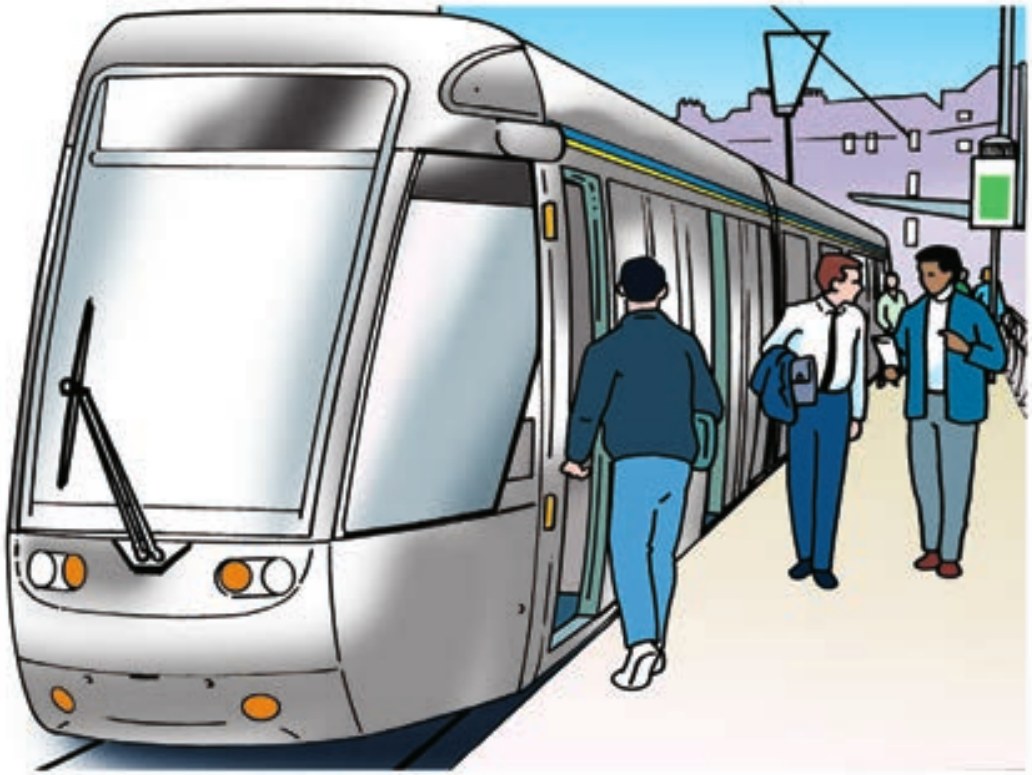
Road users must be familiar with signs for tram tracks for on-street trams (such as the Luas in Dublin city and suburbs).
Regulatory signs for tram lanes
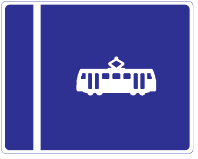
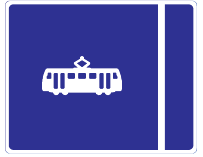
The blue signs pictured below show that a tram lane is running beside a traffic lane ahead. A driver can only enter the tram lane to overtake another vehicle when it is safe to do so.
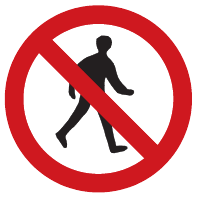
The red and white sign pictured below shows that a pedestrian may not walk beyond the point where the sign is placed.
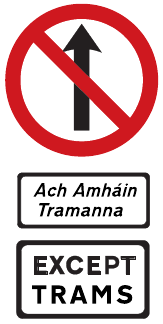
A ‘No Entry’ sign with the information plate ‘Except Trams – Ach amháin Tramanna’ means that the street is only for trams and no other traffic is allowed enter it.
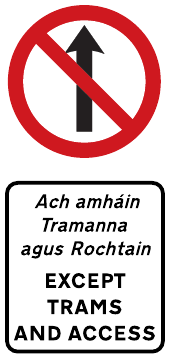
A ‘No Entry’ sign with the information plate ‘Except Trams and Access – Ach amháin Tramanna agus Rochtain’ means that a driver or cyclist may enter the street if they need to enter or leave a building.
Remember, when approaching junctions where there is a tram line:
- obey traffic lights, and
- keep yellow junction boxes completely clear.
For more information on traffic lights, see Section 7. For more information on types of junctions, see Section 9.
Warning signs for tram lanes
Pedestrians should cross tram tracks only where they see the sign pictured below. It displays a tram symbol and the words ‘Féach gach treo - LOOK BOTH WAYS’ to indicate a tramway crossing point.
The alternative text that may be shown on this warning is ‘Féach ar dheis, LOOK RIGHT’ or ‘Féach ar chlé, LOOK LEFT’.
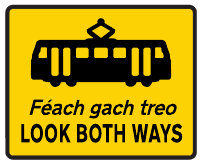
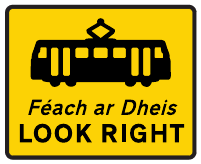
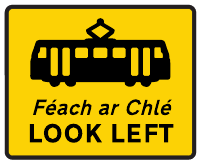
When in the vicinity of tramways, pedestrians are advised to:
- stop, look both ways, listen;
- walk, do not run;
- always use designated crossing points; and
- obey signs and listen for warning horns and tram chimes.
Cyclists need to take special care because tram tracks can be slippery, especially during wet or icy weather. The Luas warning sign for cyclists is shown below.
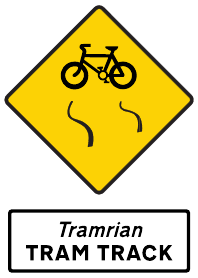
In particular, cyclists should avoid braking while on tram rails. They should always cross tram rails at a right angle or as close to it as possible.
They should take care to avoid getting their bicycle wheels caught in the groove of the tram rails.
Where there is a risk of bicycle wheels becoming trapped in the tram tracks or shared crossing points, cyclists should dismount.
Road users should be aware of the overhead wires used by trams. This is particularly important for drivers carrying loads and people carrying long items. All road users should be careful not to risk electrocution by touching overhead wires, even indirectly.
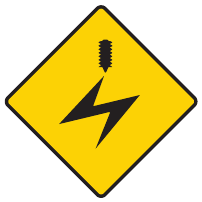
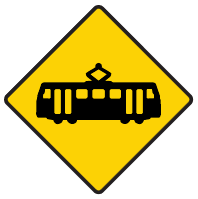
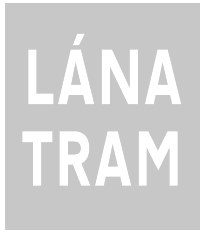
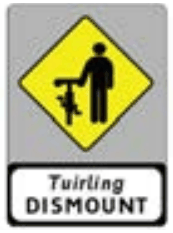
The LÁNA TRAM roadmarking sign may be used to draw attention to the presence of tram tracks. It is an information sign to tell you there is a section of road used by trams and vehicles. You should be aware that trams are controlled by a different type of light signal and that you need to be extra careful.


Drivers must not follow a tram through a traffic light controlled junction unless permitted to do so. For further information go to: www.luas.ie/-rules/
Railway level crossings
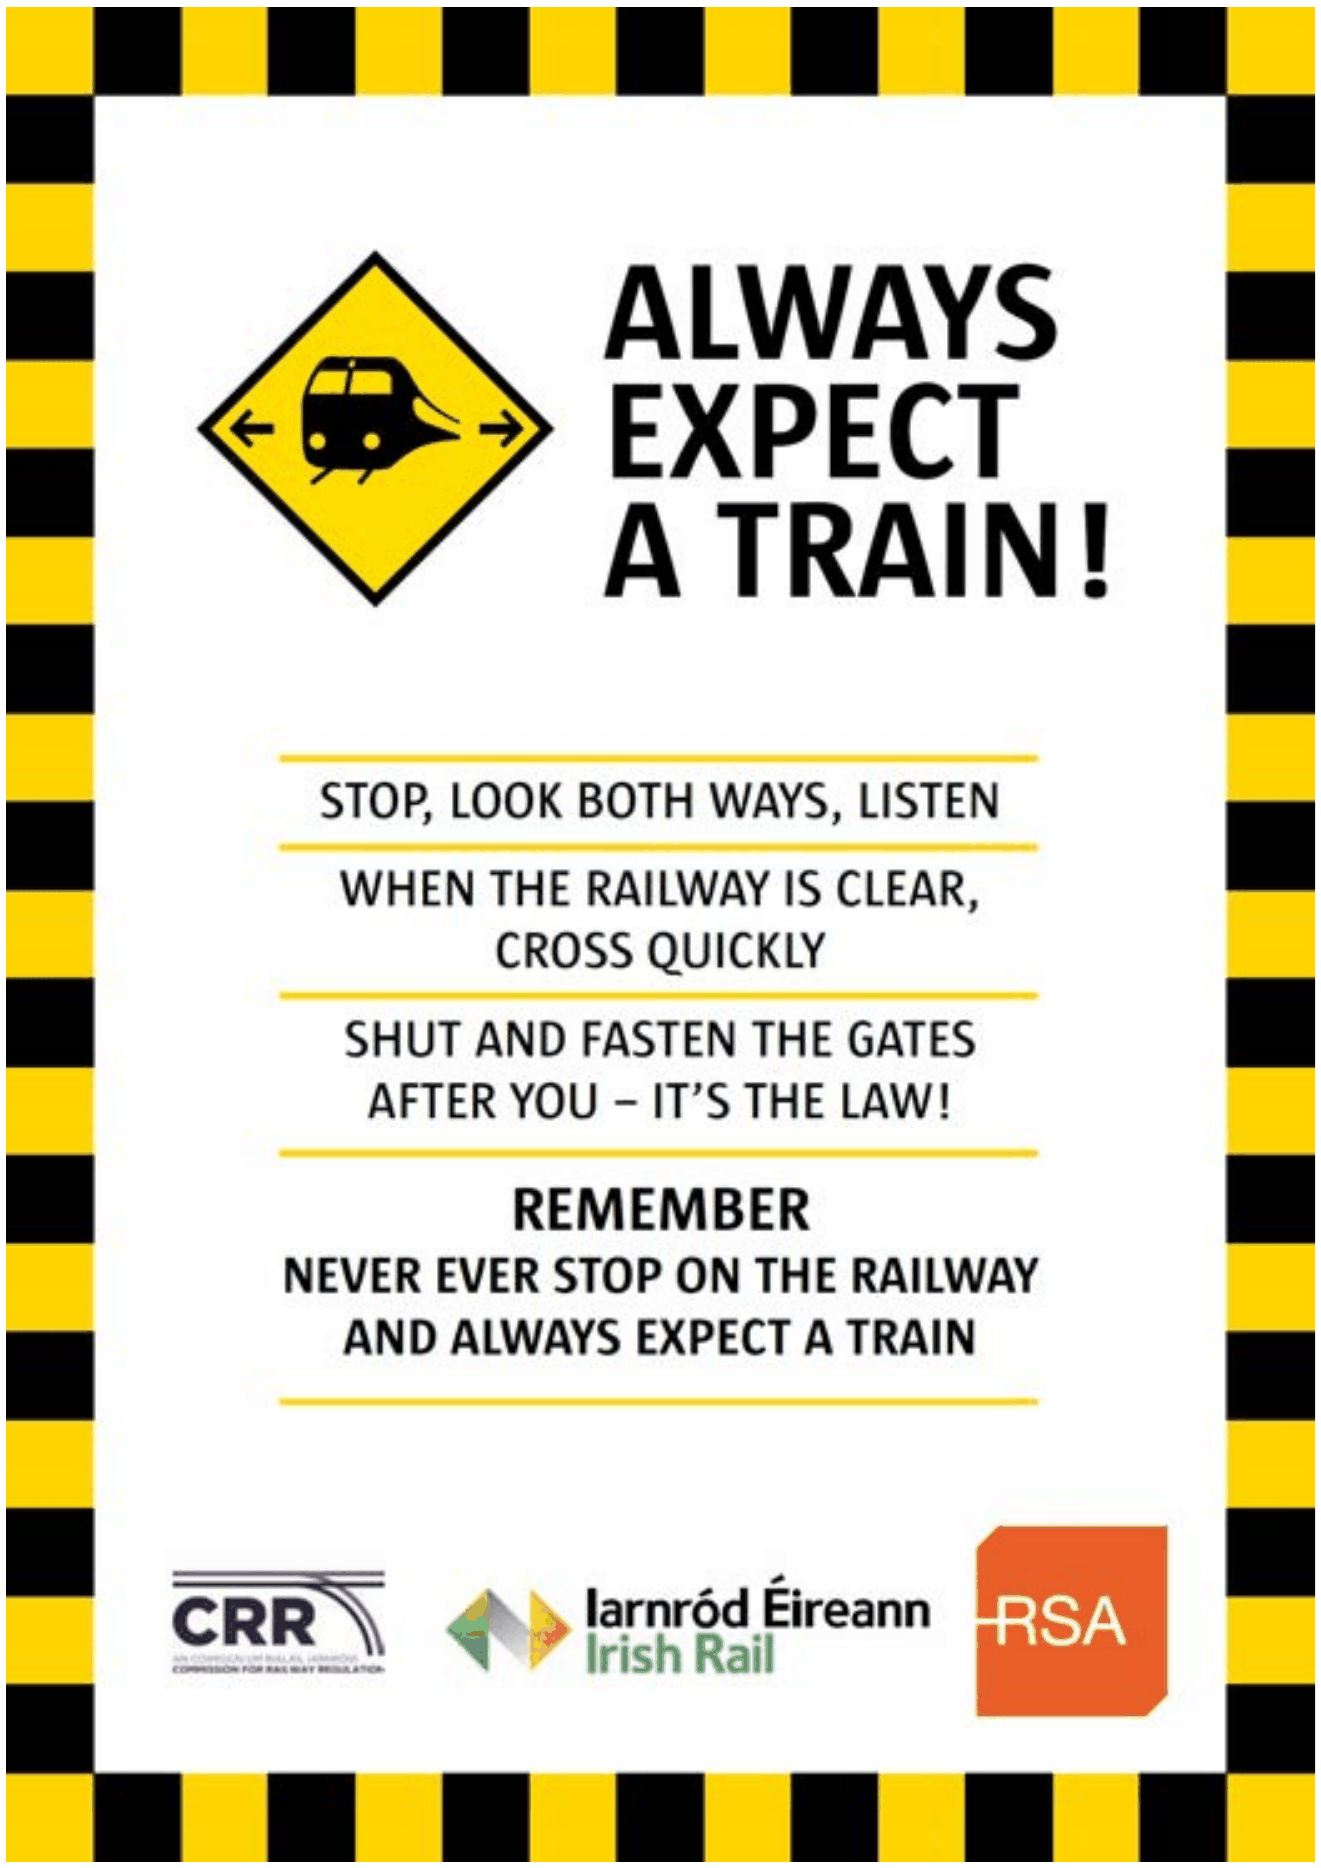
A railway level crossing is an intersection where a road or passage crosses a railway track.
Drivers and other users should be aware of the different types of crossing, and should know how to cross safely. You must always approach a level crossing with care.
This section outlines the different types of level crossings and the correct and safe way to use them.
As you approach any railway level crossing you must obey the signs and roadway markings, slow down and be prepared to stop.
You must not enter a yellow box area unless you can clear it without stopping. You must never stop on the railway tracks.
At unattended level crossings:
Use the Rail Cross Code each time you cross:
- Always expect a train
- Stop, Look and Listen
- Stop – at least two metres before the railway line
- Look – right and left, watching for the lights of approaching trains
- Listen – for a train horn or whistle
- Give way to trains
Let any approaching train pass, then look right and left again
- When the railway is clear, cross quickly.
- If there are gates, shut and fasten them after you. It’s the law.
REMEMBER
Never stop a vehicle on the railway tracks.
Emergency actions at level crossings
If your vehicle stalls or an animal strays on the railway:
- Move everyone well clear of the railway.
- Leave the animal or vehicle where it is.
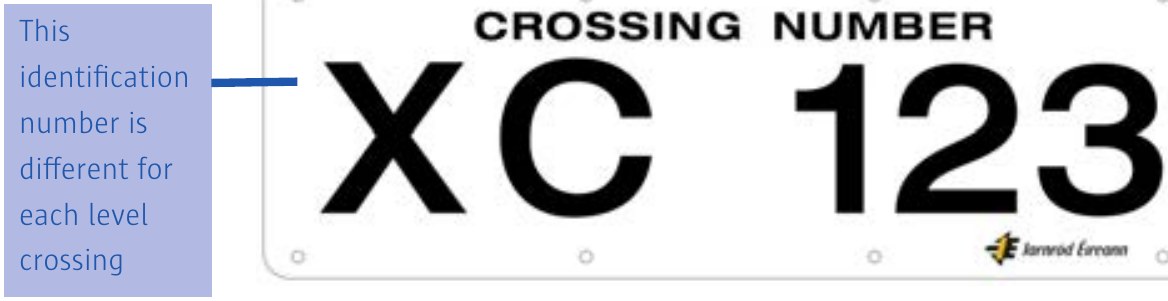
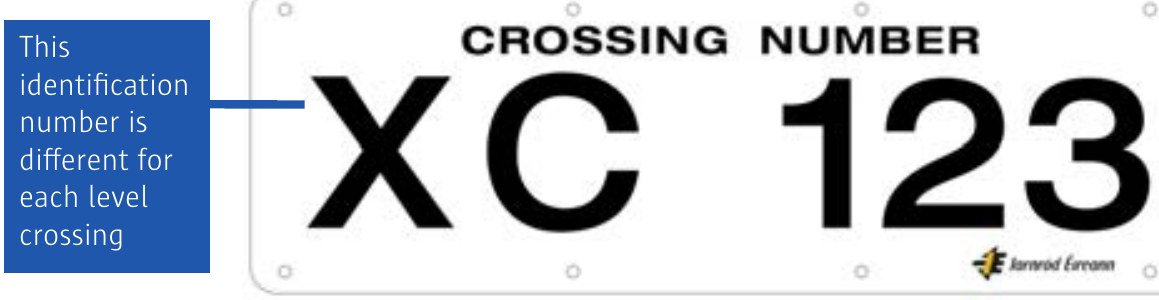
- Tell the railway controller, using the phone number displayed at the crossing.
- State the ‘crossing number’ shown at the crossing.
Unusual movements across level crossings
Drivers of very high vehicles should note that at level crossings with overhead electrified lines, such as on the DART network, the safe headroom is 5 metres (16ft 4ins).
You should contact the railway in advance, using the phone number displayed at the level crossing, when arranging special events such as matches, funerals or processions that will involve the use of the level crossing.
At level crossings with iron gates or automatic half-barriers, or on minor roads where protection is by traffic lights only, you should contact the railway, using the phone number displayed at the level crossing, to get permission before crossing with:
- awkward vehicles – for example, long, low, wide, heavy or slow, vehicles,
- vehicles carrying dangerous goods or exceptional loads, and
- crowds of people or herds of animals.
Decision Support System (DSS)
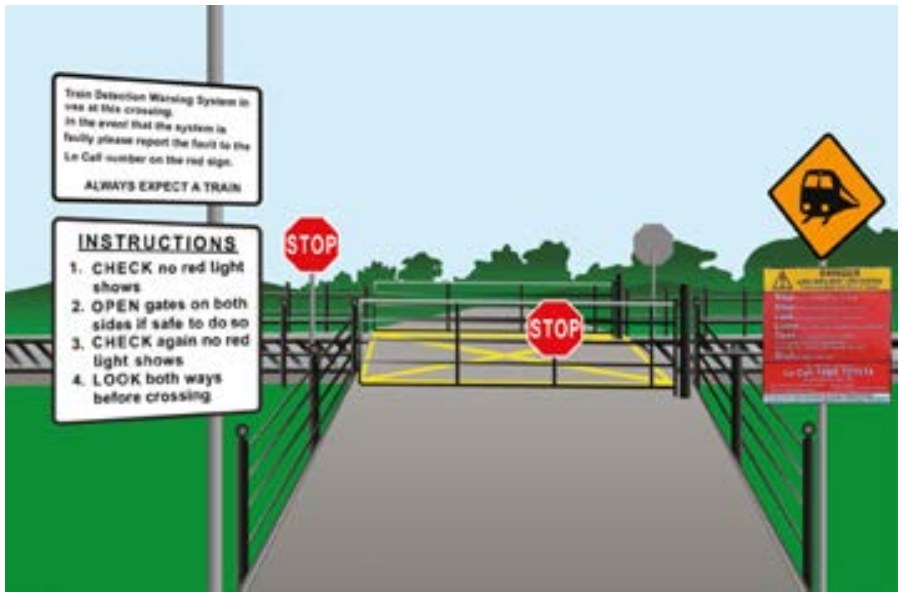
User-worked level crossings are those gated crossings where the road user is required to safely operate the gates. It is vital for your own safety and for others using this type of level crossing that you always shut and fasten the gates. Leaving gates open could result in children, animals or unsuspecting drivers to enter the level crossing and into the path of oncoming trains.
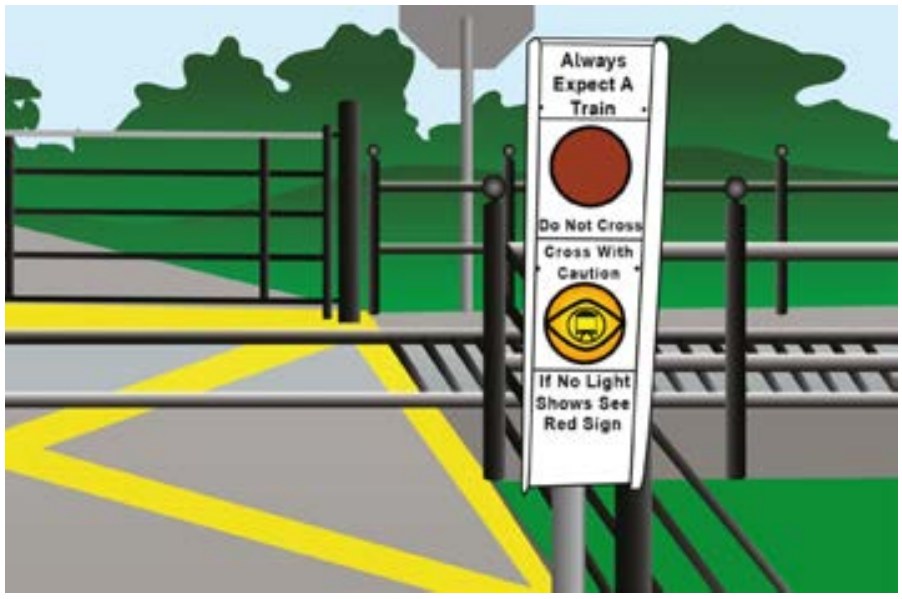
These crossings are increasingly being equipped with technology which can help to warn level crossing users of the presence of a train and aid them in deciding whether it is safe to cross. These systems provide warning lights, with a red light indicating that a train is approaching and the user should stop. An orange light indicates that the road user may proceed with caution.
Trains are quiet, travel fast and are unable to stop quickly. Remember – always expect a train.
How to use different types of level crossings safely
1. Unattended railway level crossings with iron gates
These unattended level crossings are found on minor roads. The railway is normally guarded by iron gates which must be kept shut – there is no other protection. The user has the responsibility to open and shut the gates after use. It’s the law.
These crossings can be dangerous to use and drivers should use all available help to cross safely. It is preferable for drivers to use a bridge or an attended or automated level crossing where one is available.
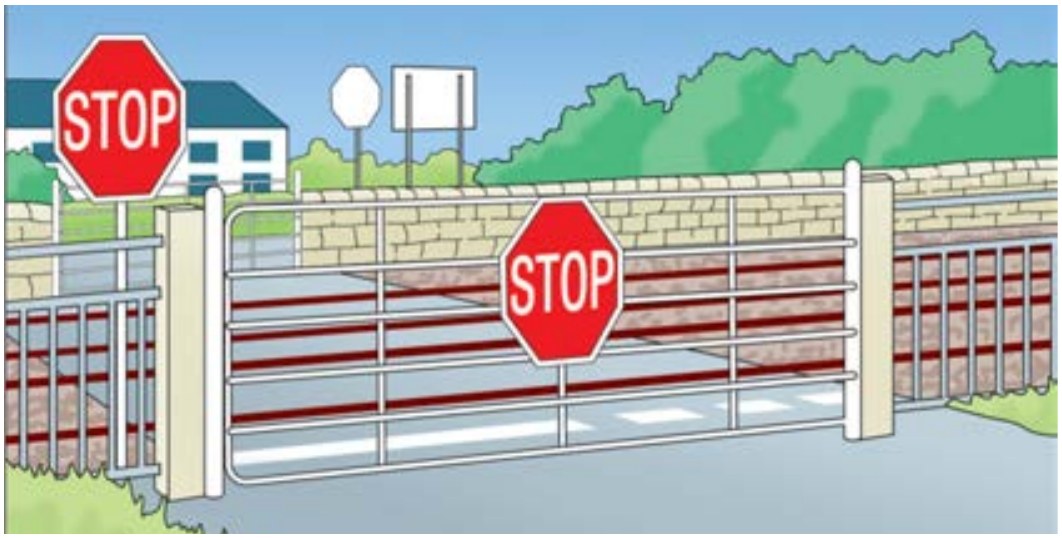
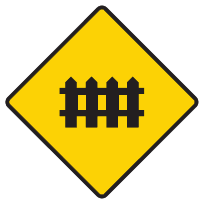
Drivers – what you should do:
Prepare
- STOP clear of the gates.
- Switch off phone and music systems.
- Open windows on driver and passenger sides.
- Read instructions at the crossing.
- Get a helper to operate the gates if possible.
Use the Rail Cross Code each time you cross:
- Always expect a train
- Stop, Look and Listen
- Stop – at least two metres before the railway line
- Look – right and left, watching for the lights of approaching trains
- Listen – for a train horn or whistle
- Give way to trains
Let any approaching train pass, then look right and left again
- When the railway is clear, cross quickly.
- If there are gates, shut and fasten them after you. It’s the law.
Drive across safely
- First walk across and open both gates.
- Drive forward and STOP two metres clear of the railway line.
- Apply your handbrake.
- Look right and left and listen.
- Drive across quickly when the railway is clear.
- Stop well clear of the tracks on the opposite side.
Drivers – what you must do:
Shut gates at unattended level crossings
- You must shut and fasten the gates as soon as you and any person, animal or vehicle under your care has passed through.
- Even if the gates are open when you arrive, you must shut and fasten them after you to protect others.
- Failure to shut and fasten the gates is an offence.
REMEMBER
Stay Alert…
STOP, LOOK and LISTEN
Give way to trains
Think safety
Always shut and fasten the iron gates
Failure to do so is an offence.
2. Attended railway level crossings with gates or barriers operated by railway staff
These level crossings are manually operated by railway staff. The level crossing is only open to the public when the gates are fully open to the road.
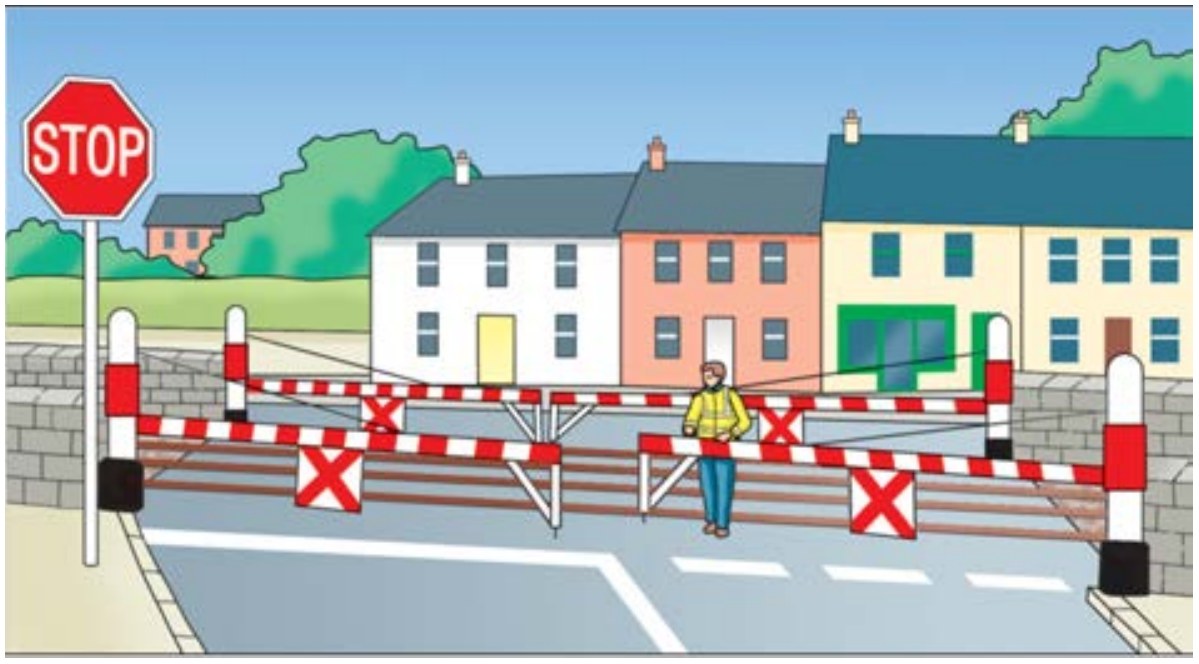
Drivers – what you must do:
- Slow down approaching the crossing.
- Be prepared to stop if necessary.
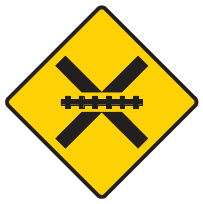
3. Automated railway level crossings protected by road traffic lights only
These level crossings have no barriers or gates. Users must obey the road traffic lights at these open level crossings.
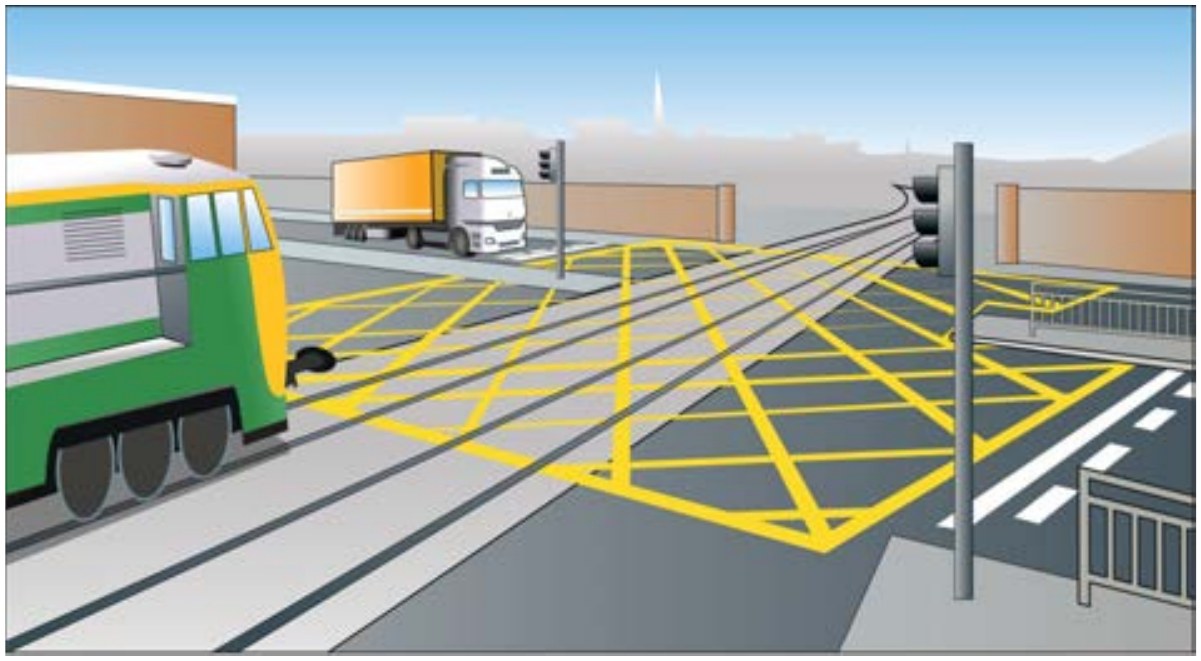
Drivers – what you must do:
- Obey the rules for traffic lights.
- If you have already entered the crossing, move clear as quickly as possible.
- Don’t drive onto the railway track until you can see enough free space on the other side.
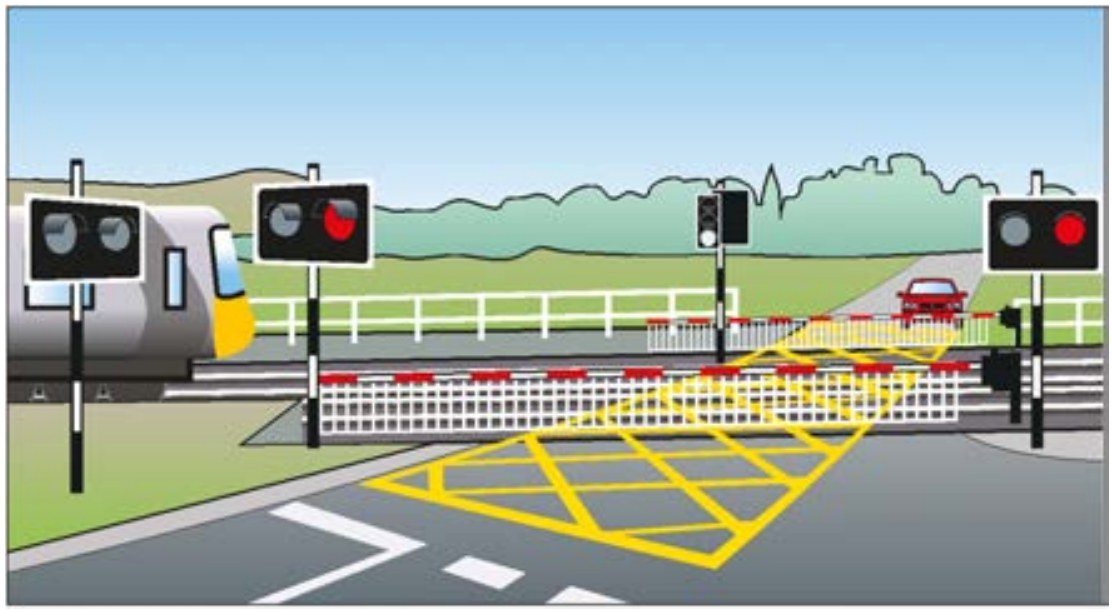
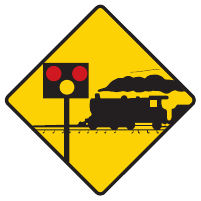
4. Automated railway level crossings with barriers and flashing red lights
These level crossings have barriers and flashing lights. The barriers automatically come down when a train is approaching. The amber light is the same as an amber traffic light – stop safely when the amber light shows. Flashing red lights have the same meaning as a steady red traffic light – you must stop safely when they show.
Drivers – what you must do:
- Obey the rules for traffic lights.
- If you have already entered the crossing, move clear as quickly as possible.
- Wait for all lights to go out and barriers to be raised before moving on.
- Don’t drive onto the railway line until you can see enough free space on the other side.
REMEMBER
A flashing red light always means stop
You must never zigzag around the barriers of a level crossing
Pedestrians crossing the railway
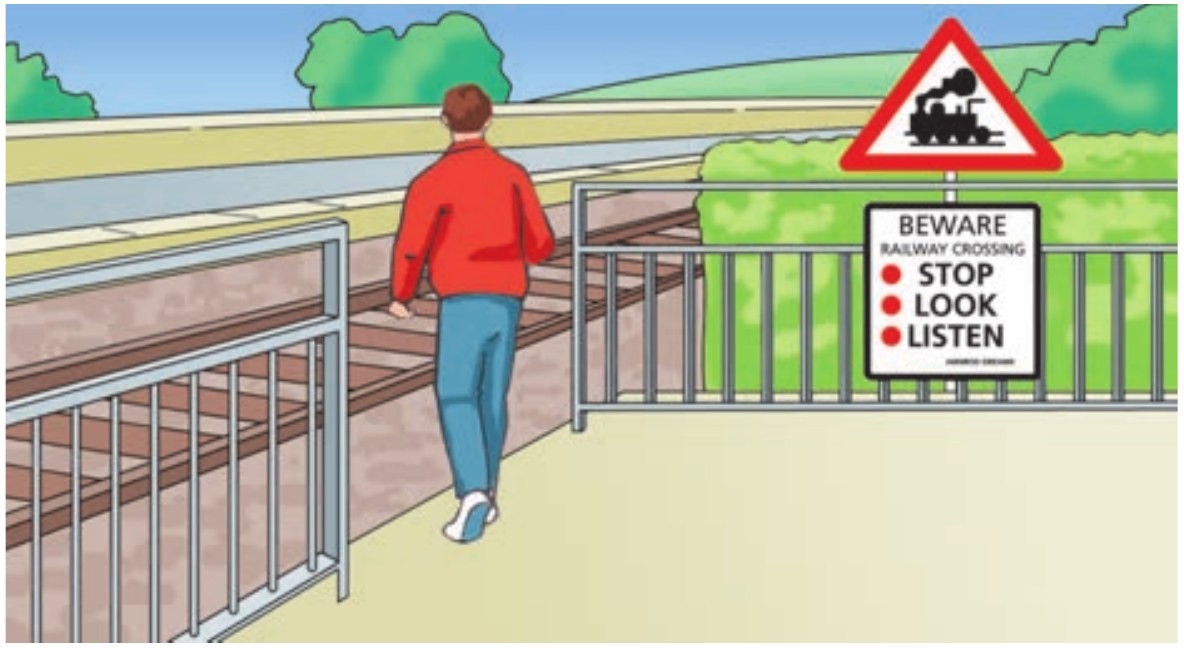
Pedestrians – what you should do:
Prepare
- Switch off phones and music systems.
- Read any instructions at the crossing.
- Contact the railway in advance, using the phone number displayed at the level crossing:
- if you are arranging special events such as matches, funerals or processions that will involve the use of the level crossing
- to get permission before crossing the railway with crowds of people or herds of animals at a level crossing with iron gates or automatic half-barriers, or on minor roads where protection is by traffic lights only
- Take extra care with a wheelchair, pram or buggy.
Beware
- Never trespass onto a railway line.
- Always expect a train.
- Supervise children near the railway.
- Keep dogs on a lead.
- Only cross at a designated level crossing.
- Obey traffic lights, where provided.
- If crossing with a pram, wheelchair or bicycle, you should cross the tracks carefully to avoid getting the wheels caught in the groove.
Use the Rail Cross Code each time you cross:
- Always expect a train
- Stop, Look and Listen
- Stop – at least two metres before the railway line
- Look – right and left, watching for the lights of approaching trains
- Listen – for a train horn or whistle
- Give way to trains
Let any approaching train pass, then look right and left again
- When the railway is clear, cross quickly.
- If there are gates, shut and fasten them after you. It’s the law.
REMEMBER
STOP, LOOK and LISTEN
Give way to trains
Never trespass onto the railway
Pedestrians – what you must do:
Shut gates at unattended level crossings
- You must shut and fasten the gates as soon as you and any person, animal or vehicle under your care has passed through.
- Even if the gates are open when you arrive, you must shut and fasten them after you to protect others.
- Failure to shut and fasten the gates is an offence.
REMEMBER
Always shut and fasten the iron gates.
Failure to do so is an offence.
Emergency actions at level crossings
If your vehicle stalls or an animal strays on the railway:
- Move everyone well clear of the railway.
- Leave the animal or vehicle where it is.
- Tell the railway controller, using the phone number displayed at the crossing.
- State the ‘crossing number’ shown at the crossing.
Cyclists and horse riders crossing the railway
- As you approach a level crossing, you must obey the signs, slow down and be prepared to stop.
- You must obey the Rules of the Road.
- Follow the relevant instructions and emergency actions applying to pedestrians at railway level crossings.
- Cyclists – cross at right angles to the tracks or else dismount to avoid getting the wheels caught in the groove.
- Cyclists and horse riders – dismount and walk across the railway line at iron-gated level crossings and at passages.
For further information go to www.rsa.ie/Safety at Level Crossings.
Railway bridges and overhead structures
Introduction
A railway bridge is a structure where a road or passage crosses a railway track by a bridge either under or over the railway. As you approach a railway bridge, you must obey any signs and roadway markings.
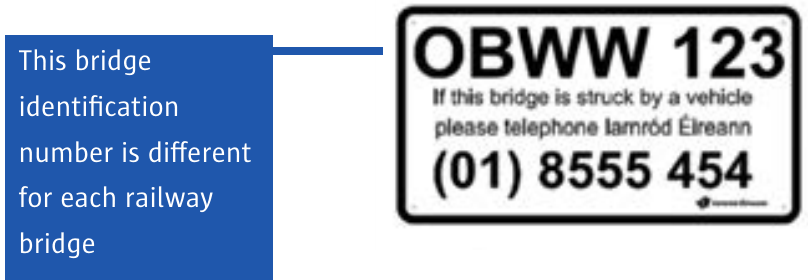
You will see an information notice similar to the one shown below on railway bridges. This sign plate gives an identification number for the bridge and Iarnród Éireann’s emergency contact phone number.
Emergency actions – reporting bridge incidents
You must report immediately any incident of your vehicle striking a railway bridge or structure whether or not damage is obvious. Drivers must use the emergency telephone number to contact Iarnród Eireann following any incident at a bridge, stating the nature of the incident and the bridge identification number on the sign.
If you cannot make contact immediately at this number, you must immediately notify a member of An Garda Síochána.
REMEMBER
You must report any incident of your vehicle impacting a railway structure.
Failure to do so is an offence.
Bridge under the railway with height restriction
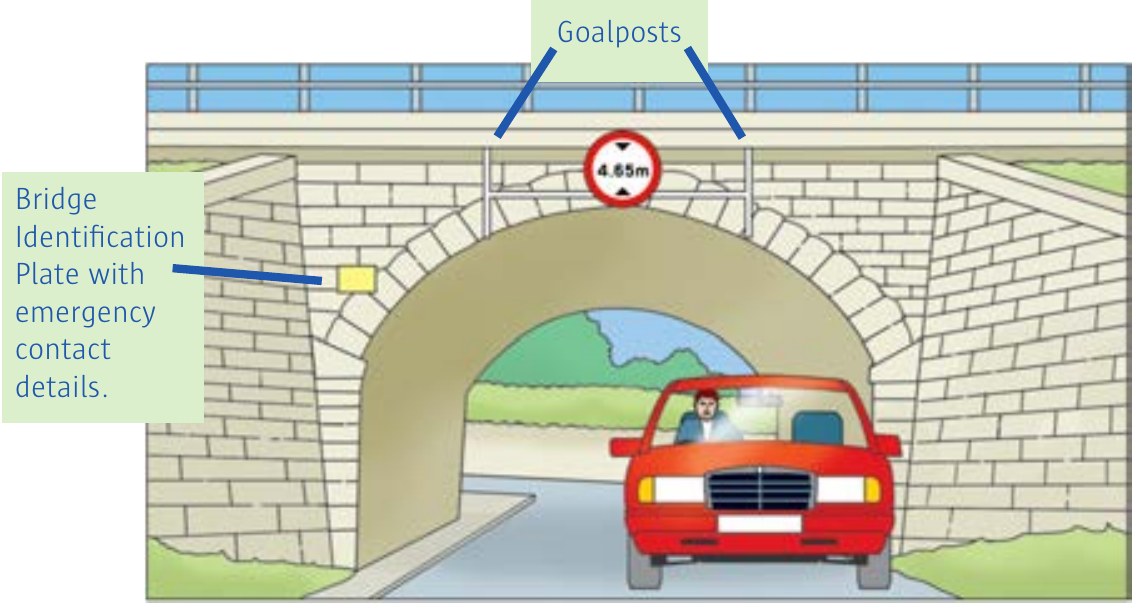
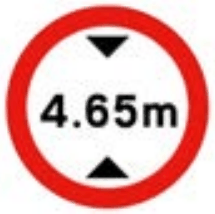
This is an example of a bridge with a height restriction under the railway. The sign below is a regulatory height restriction sign, which may appear on a height-restricted railway bridge. You must not pass unless your vehicle is lower than the height shown on the sign.
In the case of arch bridges, the indicated height is available only over a certain width of the arch. This width is shown by ‘goalposts’.
As you approach a bridge under the railway, you may see an advance warning sign such as the ‘restricted headroom’ sign below showing the height restriction that applies at the bridge. The height restriction is written first in feet and inches and then in metres.
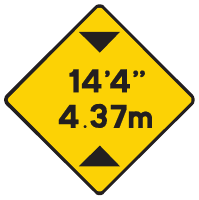
Your vehicle, including any load being carried, must be lower than the height shown on the warning sign. It is very important to know the height of your vehicle and of any load being carried before you start your journey.
You may also encounter advance information signs with warnings such as the signs below.
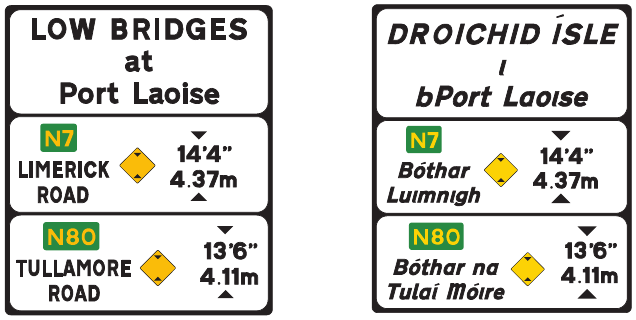
REMEMBER
Know your height. Know your route.
Bridge over the railway
This is an example of a bridge over the railway. There can be restrictions on vehicles entitled to use these bridges. These restrictions will usually be related to vehicle weight, width and number of axles.
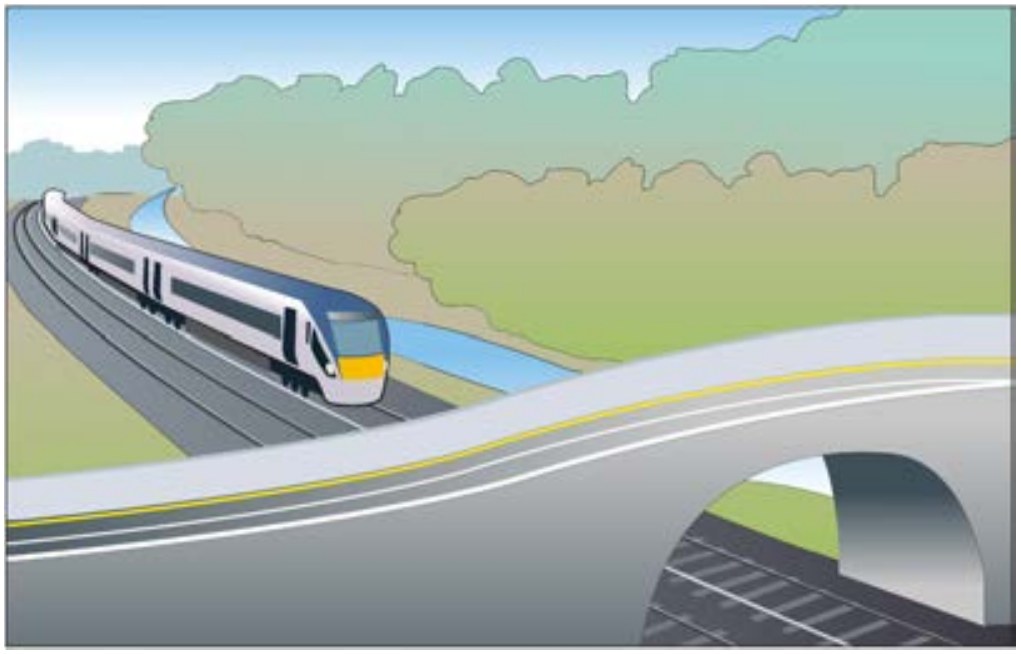
These are some of the signs that you may see at a bridge over a railway.
As you approach a railway bridge you must obey any road signs and roadway markings.
| Examples of weight restriction signage | ||
|---|---|---|
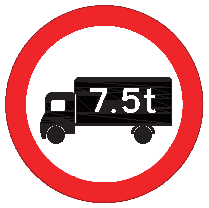 |
Maximum Gross Weight | The total weight of your vehicle including its load must weigh less than this to safely proceed beyond the sign. |
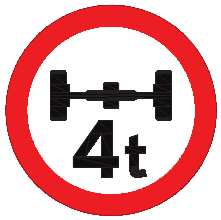 |
Maximum Axle Weight | If any axle on your vehicle exceeds this weight, you cannot proceed beyond the sign. |
| Other signs | ||
|---|---|---|
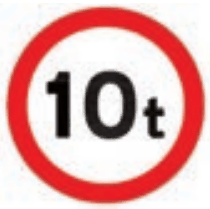 |
Maximum Gross Weight (Safety) | If your vehicle’s gross weight exceeds that specified on the sign, you cannot proceed beyond the sign. |
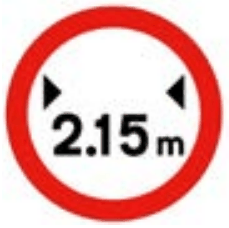 |
Maximum Vehicle Width | Your vehicle must be narrower than the width shown to be permitted to proceed beyond the sign. |
Road tunnel signs
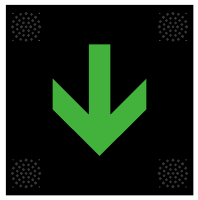
These lane control signs are found above each traffic lane at, or on, the approach to the entrance to a road tunnel and at regular intervals inside a road tunnel. When the signs are operational, the amber lights at the top and bottom will flash in turn.
A green arrow pointing down means the lane is open and you are allowed to proceed in that lane.
A red X means the lane is closed. You must stop. You must not pass this sign. It has the same effect as a stop sign.
A green arrow pointing to the left means you must move into the left-hand lane. In doing so you must observe the general rules of the road relating to safely changing lanes.

A green arrow pointing to the right means you must move into the right-hand lane. In doing so you must observe the general rules of the road relating to safely changing lanes.
The following sign means that goods vehicles and large non-passenger vehicles with three or more axles cannot use the right-hand lane of the carriageway. You must travel in the left-hand lane of the carriageways in a road tunnel.
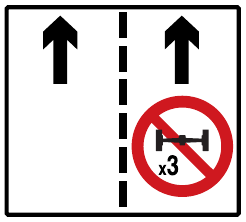
The regulation does not apply when:
- a red X is displayed over the left-hand lane, which means the lane must not be used;
- a green arrow is displayed over the right-hand lane, which directs all vehicles to use the right-hand lane; or
- the left-hand lane is blocked.
There are two forms of speed limit signs in tunnels.
- A standard speed limit sign applies where there is a fixed speed limit in a tunnel. You must obey the speed limit and remember this is the maximum permitted speed, not the required speed.
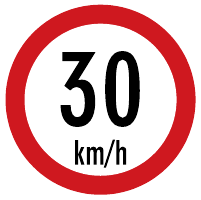
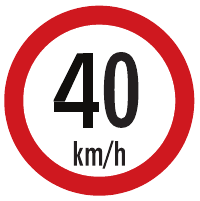
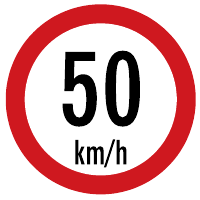
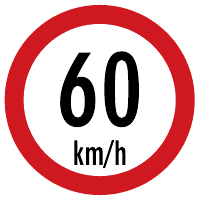
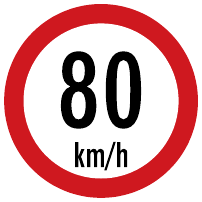
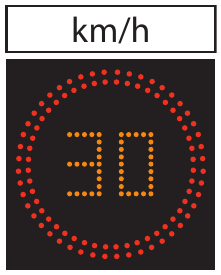
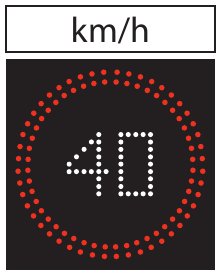
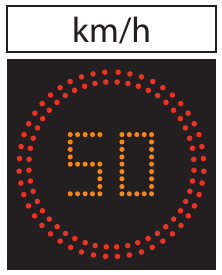
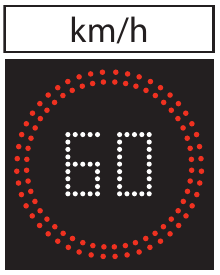
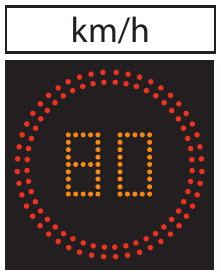
- Where the speed limit can vary in a tunnel, you will see a variable message sign, which is a black square with a red circle and numbers in white or yellow. The speed limit is shown by the numbers and will vary according to traffic conditions and road safety considerations. You must obey the speed limit and remember this is the maximum permitted speed, not the required speed.
When driving in some tunnels you may see electronic overhead signs, along with road markings (chevrons) which combined advise you of the minimum distance you should keep between you and the vehicle ahead of you. These signs should be obeyed.